Discover

Upcycling: Transform your space with upcycled furniture

Unlock upcycling secrets! Transform old into new with our DIY video. Get inspired.

Have you had something hanging around the house for a while that needs a bit of a face lift? Or perhaps there's a gap that needs to be filled in your lounge, but nothing on the market is quite fitting the bill. And, you might want to simply improve your home decor while minimising your impact on the environment.

There's a reason Kiwi love giving their furniture a new lease on life - you can find upcycled furniture all across NZ. Not only do you get a brand new looking piece of furniture but you’re also helping the environment by extending an item’s life as part of the circular economy.

For someone who has never upcycled before, it can seem like a daunting task, but you can make it as easy or as hard as you’d like.

If you’re relatively new to the DIY world, look for items which have limited damage and just need a bit of a refresh such as a coat of paint or new hardware. Items made from wood are always a good option and don’t require too much prep. Start small with a chair, picture frames or some bedside drawers. Sanding and a bit of paint can do wonders when upcycling.

As Benjamin Franklin said, “By failing to prepare, you are preparing to fail”, it's the same when it comes to upcycling. The key to a successful makeover is in the preparation. If you haven’t prepared the surface correctly then imperfections could stand out, your paint might not stick, or you could do more damage than good.

Tip: You don’t always have to paint your items, instead you could stain or varnish but either way first you must prepare.

The preparation of the item all depends on what material it is made from. If it's a wood surface, the best thing to do is to remove any sticky residue with a cloth, let it dry and then start sanding. If you’re just using a small item then sandpaper should be OK to use. If it's a larger piece of furniture like a set of drawers, then an electric sander will be your best friend. Once you're done sanding, give it another wipe down to remove any remaining dust and dirt.

Tip: If you find any dents, nail holes or cracks then now is the time to fill them in with some putty and sand again.

If the thought of sanding terrifies you then chalk paint will be your holy grail. It has amazing sticking power which means that your furniture doesn’t need any prep (apart from a wipe down). The only thing you need to do is seal it at the end with wax.

Finishing the look off is easy with a change of hardware such as the handles or the upholstery. This can really make the piece look completely different and complement your personal style. And in years to come you can look back with enjoyment on your piece and think - I did that!

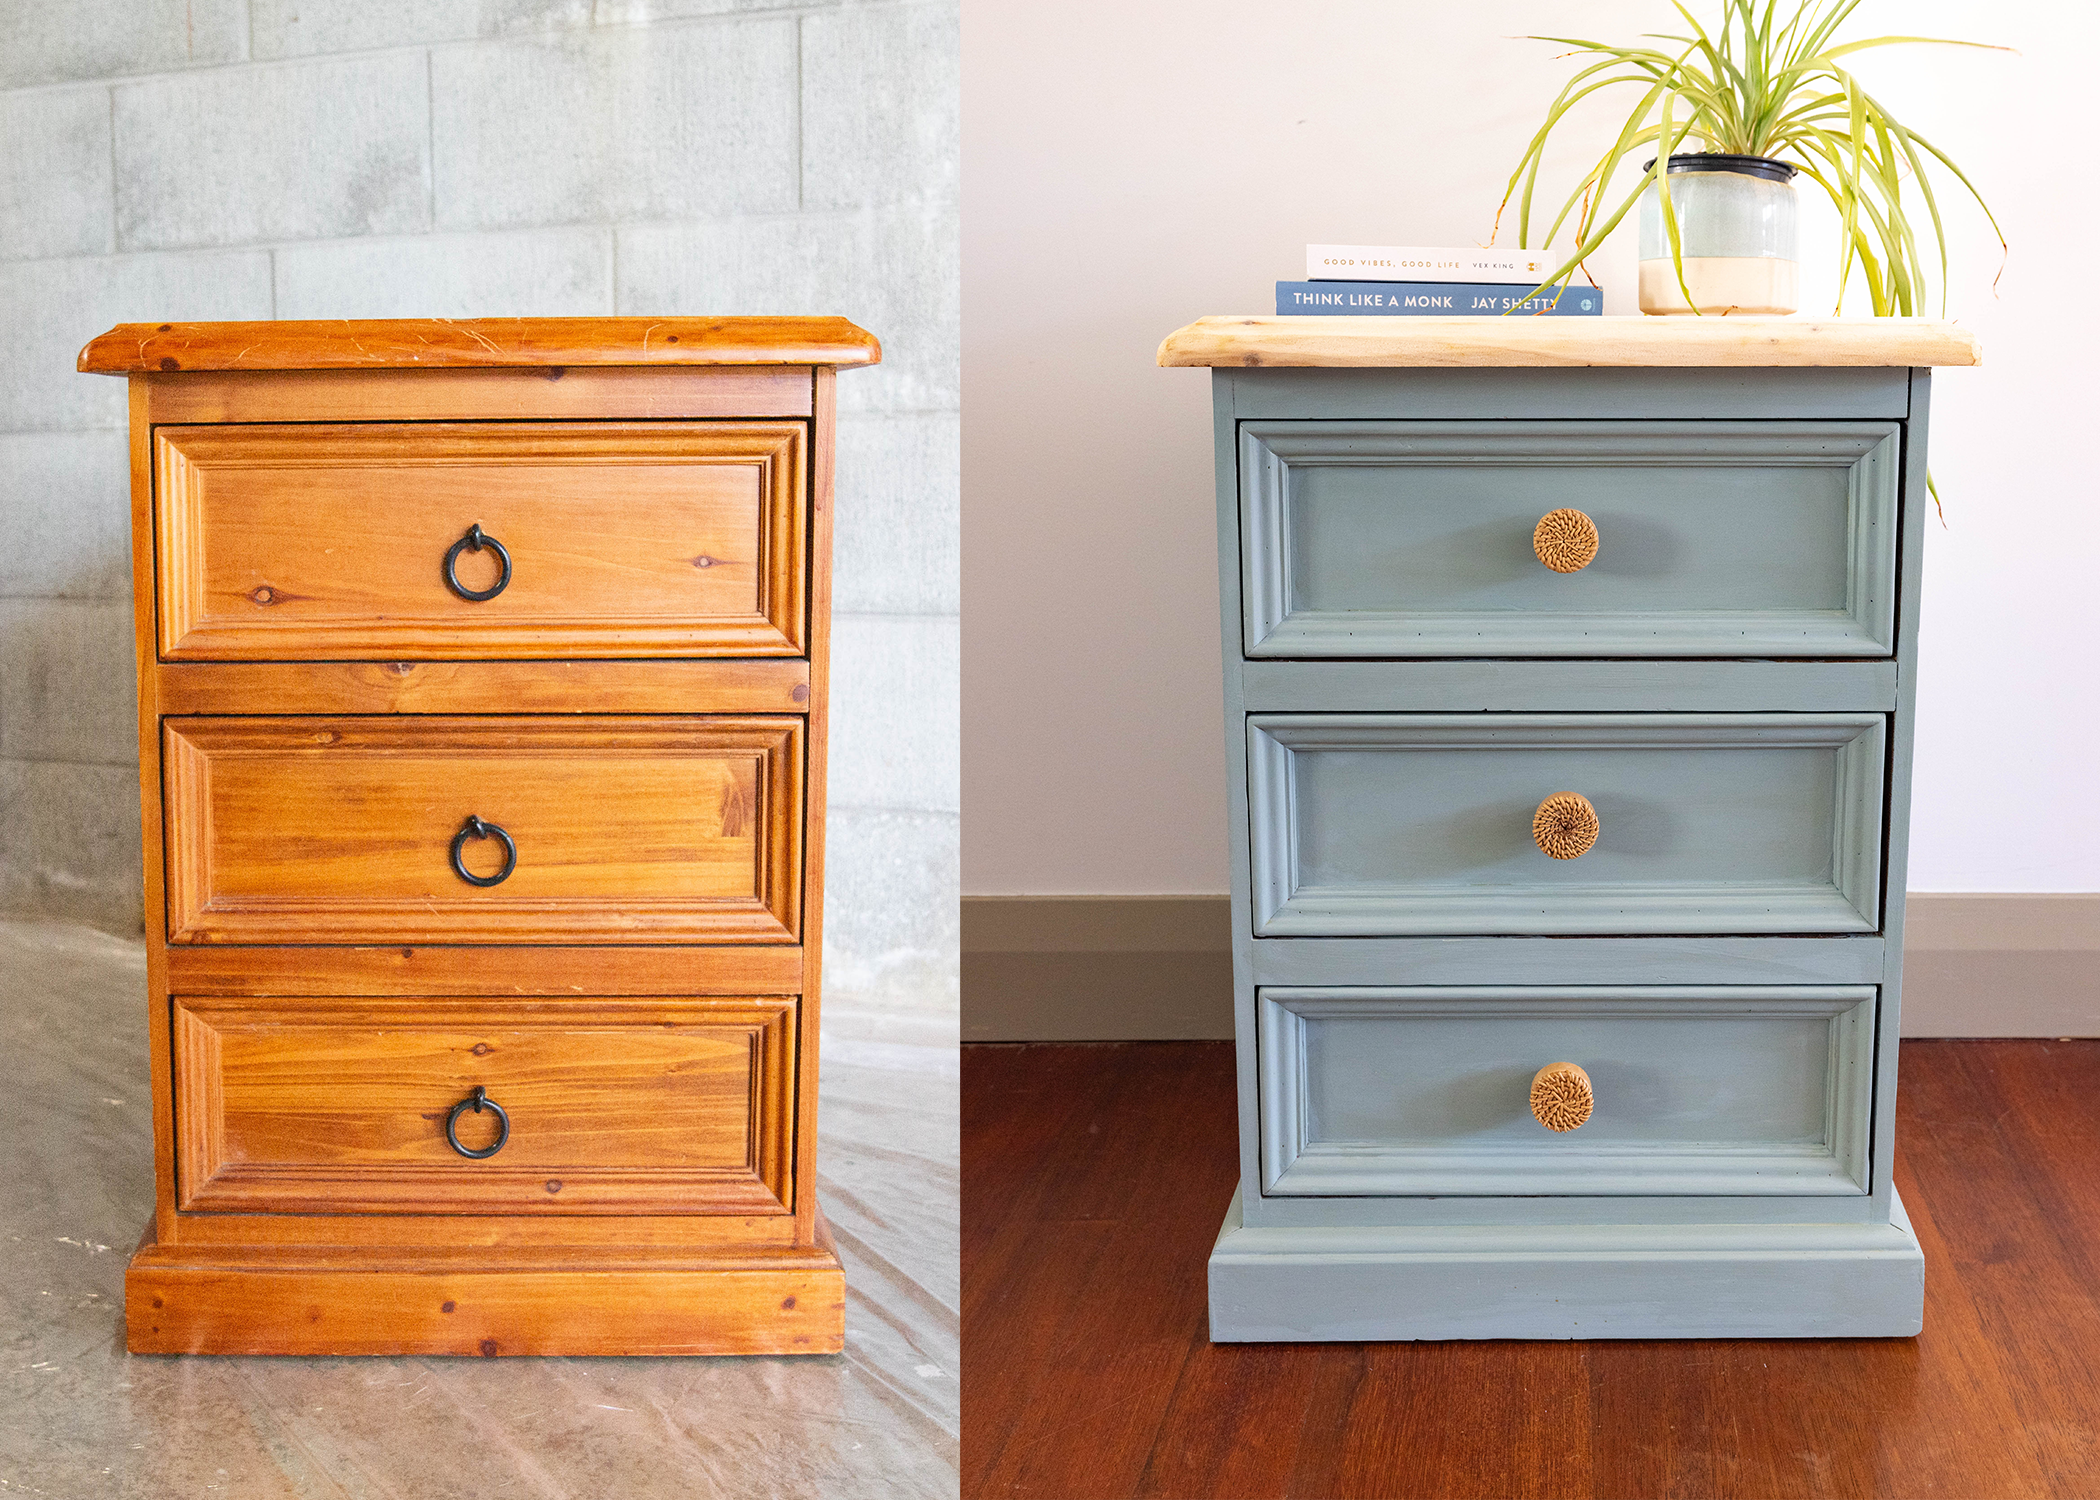
The upcycling process

Links to products used:

Author

Sophie Graham
Sophie Graham
Sophie Graham is a Digital Content Producer with over 7 years of experience in marketing and content production. Passionate about sharing the stories of the people of Aotearoa, she uses her creativity to create content that resonates with different audiences.